Failure to follow these instructions may result in loss of vehicle control, tire failure, property damage, serious injury, or death.
This manual provides general operating and installation guidance only. Actual conditions may vary significantly based on the environment, application, equipment configuration, and the skill, experience, and judgment of the individual performing the work. Users must exercise caution and sound discretion.
This Tire Pressure Monitoring System (TPMS) is intended only as a supplemental driver-assistance device. It does not replace safe driving practices, regular tire inspections, proper tire maintenance, or use of an accurate tire-pressure gauge. The driver remains responsible for the safe condition and operation of the vehicle, tires, wheels, valve stems, trailer, and towing equipment.
Do not operate while driving. Do not operate, adjust, configure, program, pair, troubleshoot, or otherwise interact with this product or a connected mobile device while driving. Complete all setup and adjustments before operating the vehicle. If the product requires attention, exit the roadway and park the vehicle in a safe location before using it.
Use this product only in accordance with all applicable federal, state, and local laws, regulations, and ordinances concerning distracted driving and use of electronic devices in a motor vehicle.
⚠ WARNING
INGESTION HAZARD: This product contains a button cell or coin battery.
DEATH or serious injury can occur if ingested.
A swallowed button cell or coin battery can cause Internal Chemical Burns in as little as 2 hours.
KEEP new and used batteries OUT OF REACH OF CHILDREN.
Seek immediate medical attention if a battery is suspected to be swallowed or inserted inside any part of the body.
Remove and immediately recycle or dispose of used batteries according to local regulations and keep away from children. Do NOT dispose of batteries in household trash or incinerate. Even used batteries may cause severe injury or death. Call a local poison control center for treatment information. Non-rechargeable batteries are not to be recharged. Do not force discharge, recharge, disassemble, heat above manufacturer's specified temperature rating or incinerate. Doing so may result in injury due to venting, leakage or explosion resulting in chemical burns.
FCC Compliance Statement
This device complies with Part 15 of the FCC Rules. Operation is subject to two conditions: (1) this device may not cause harmful interference, and (2) this device must accept any interference received, including interference that may cause undesired operation.
RVIA SAE J3309 Compliance
This TPMS is compliant with the SAE J3309 requirement per the 2029 Edition of NFPA 1192 when installed by an OEM or RVIA/RVTI-certified technician and used with TireMinder Internal TPMS sensors only.
SYSTEM COMPONENTS
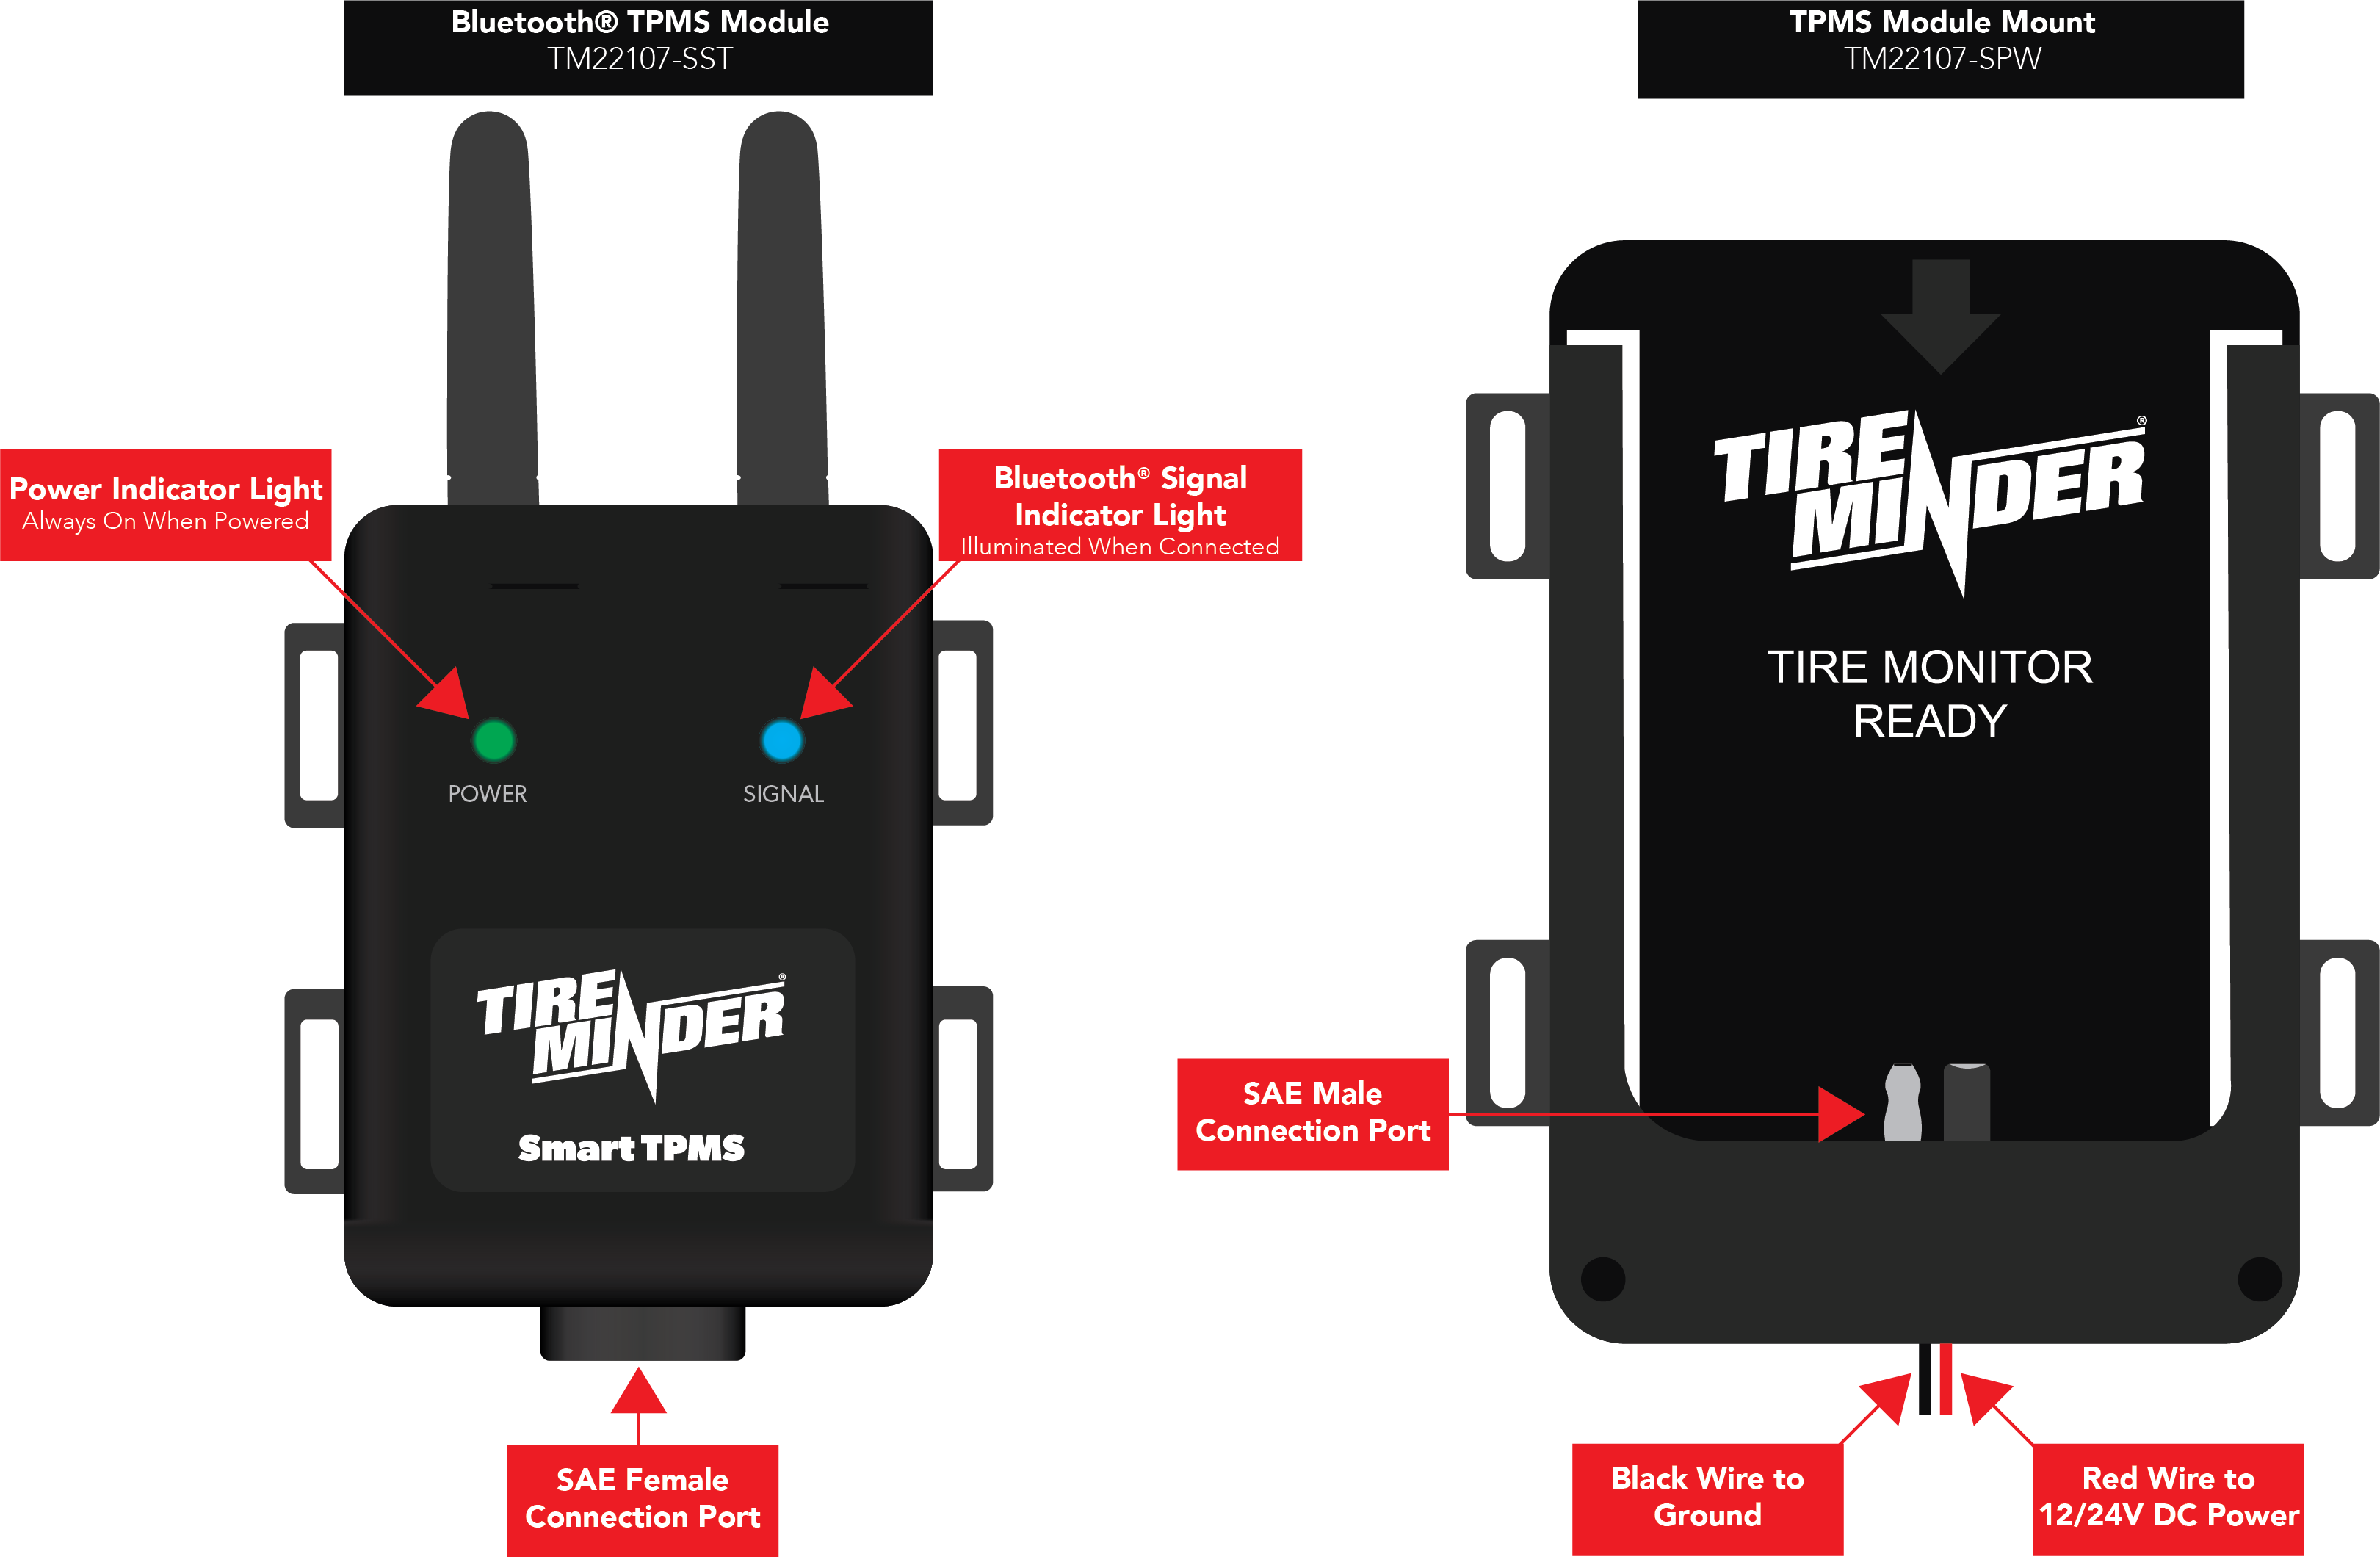
Device Key
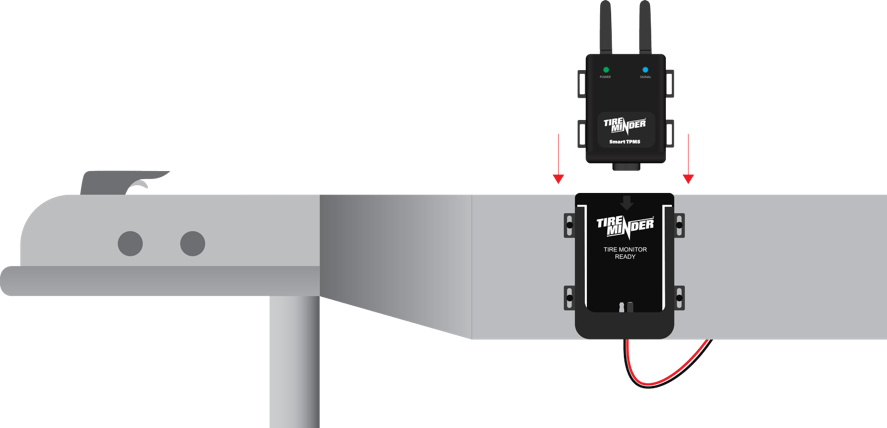
The TPMS Module receives 433 MHz tire-sensor data and sends information to the TireMinder app using Bluetooth. The mount supplies constant 12/24 V DC power.
Bluetooth TPMS Module and TPMS Module Mount.
INSTALLATION
Installing the TPMS Module and Mount
Note: Two sets of self-tapping screws are supplied: one for wood, plastic, or composite surfaces and one for metal surfaces. Ensure the proper type of screws are used to secure the TPMS Module Mount.
Step 1 — Determine Where to Mount the Module
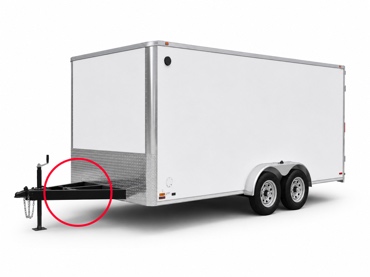
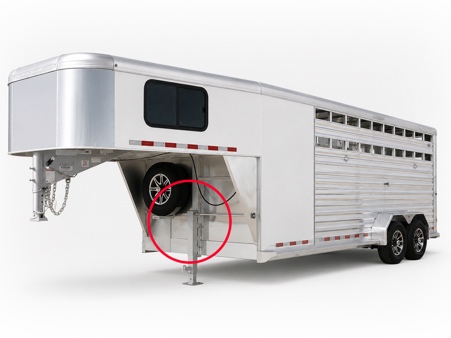
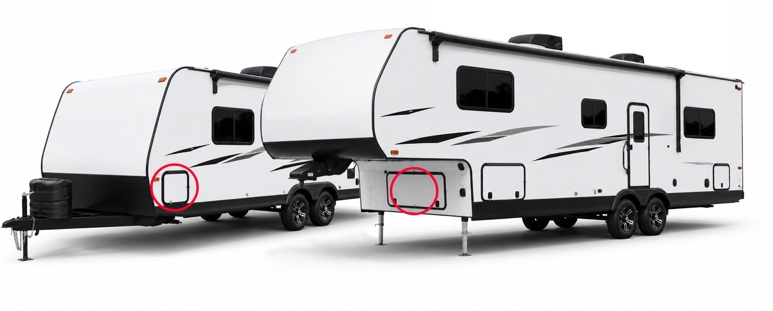
Mount on the trailer frame of a utility or boat trailer; on the exterior trailer wall for gooseneck and horse trailers; or inside the front storage compartment of a travel trailer or fifth wheel. For an aluminum-body trailer, mount on the frame or exterior wall. In a motorized RV, mount between the front steering axle and rear axle.
Recommended range: No farther than 35 ft from the farthest rear axle and no farther than 60 ft from the towing vehicle cab. An additional signal booster may be used when more range is needed.
Turn off trailer power and completely disconnect the battery before continuing.
Install the mount vertically so the module antennas face upward.
Attach the mount using the correct screws. Pre-drill with a 3/32 in drill bit. Do not overtighten.
Connect the red wire to constant 12 V DC power and the black wire to ground. If the trailer has a battery disconnect, connect ahead of the disconnect.
Restore power and slide the module into the mount. The green power light should illuminate immediately.
Electrical note: Compatible with 12 V and 24 V DC and equipped with under- and over-voltage protection. A fuse is not required; if one is used, use 3 A.
INITIAL SETUP
Get Up and Running with the TireMinder TPMS App
Note: Screen images may differ by phone or tablet brand and app version.
1. Install the App and Allow Permissions
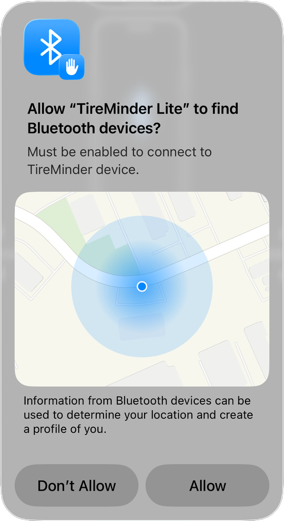
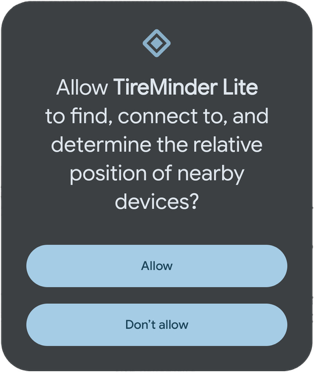
Install from TireMinder.com/app or the iOS/Android app store. Allow Bluetooth or Nearby Devices permission so the app can connect to the module. Allow Notifications so alerts can be delivered.
iOS Bluetooth permissionAndroid Nearby Devices permission
2–6. Add Your First Vehicle
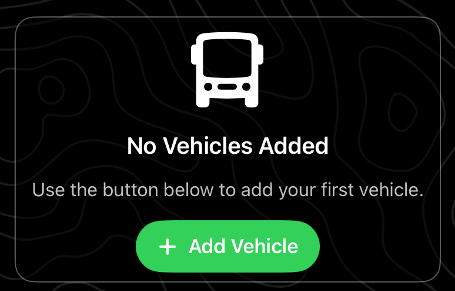
After connection, tap Add Vehicle.
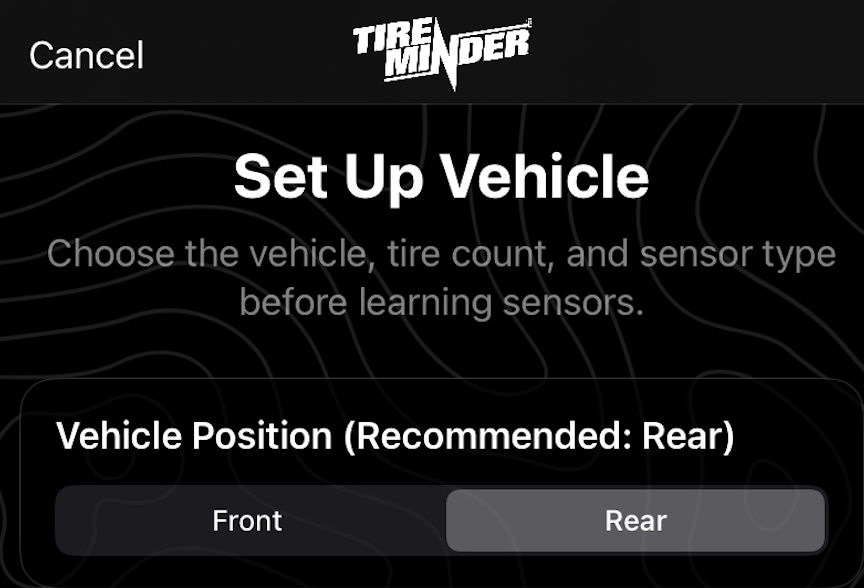
Choose the vehicle position. Use the app’s recommended position where possible.
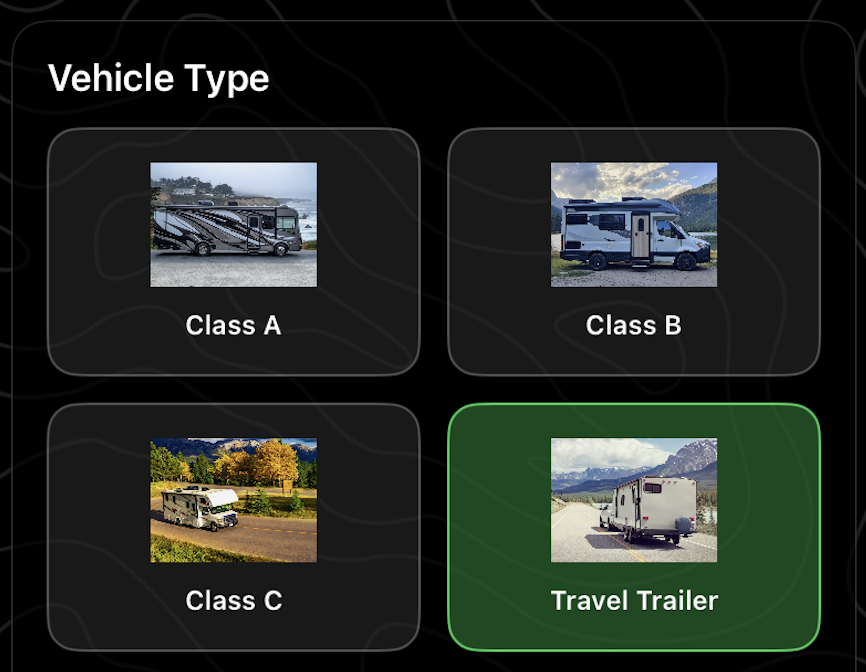
Choose the vehicle type.
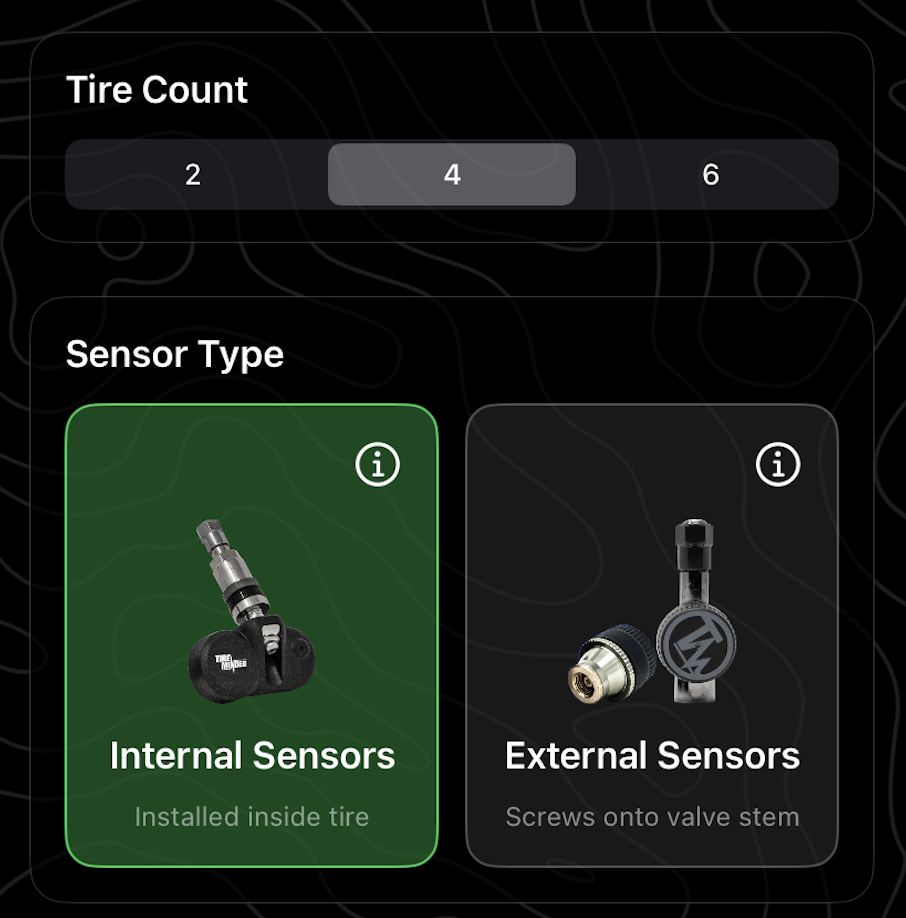
Choose the tire count and whether internal or external sensors are used.
Tap Continue to Learn Sensors.
7–12. Learn the Sensors
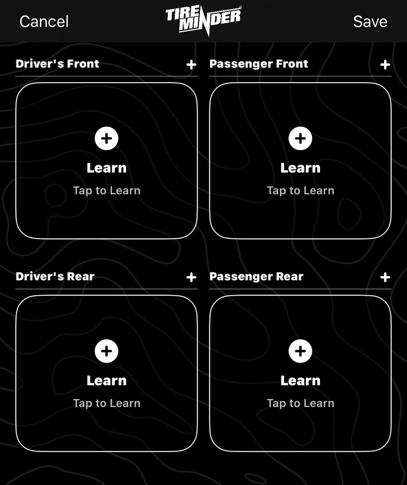
Tap the plus (+) button for the desired tire position.
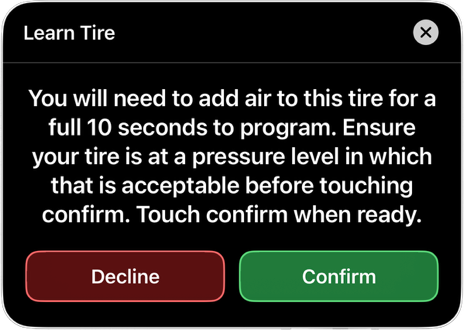
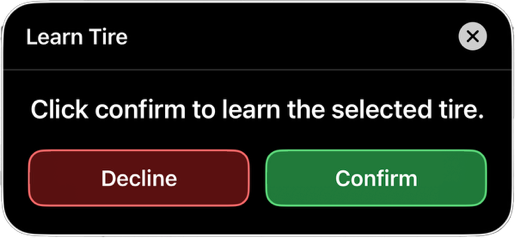
Confirm that you are ready. Internal and external sensor prompts differ.
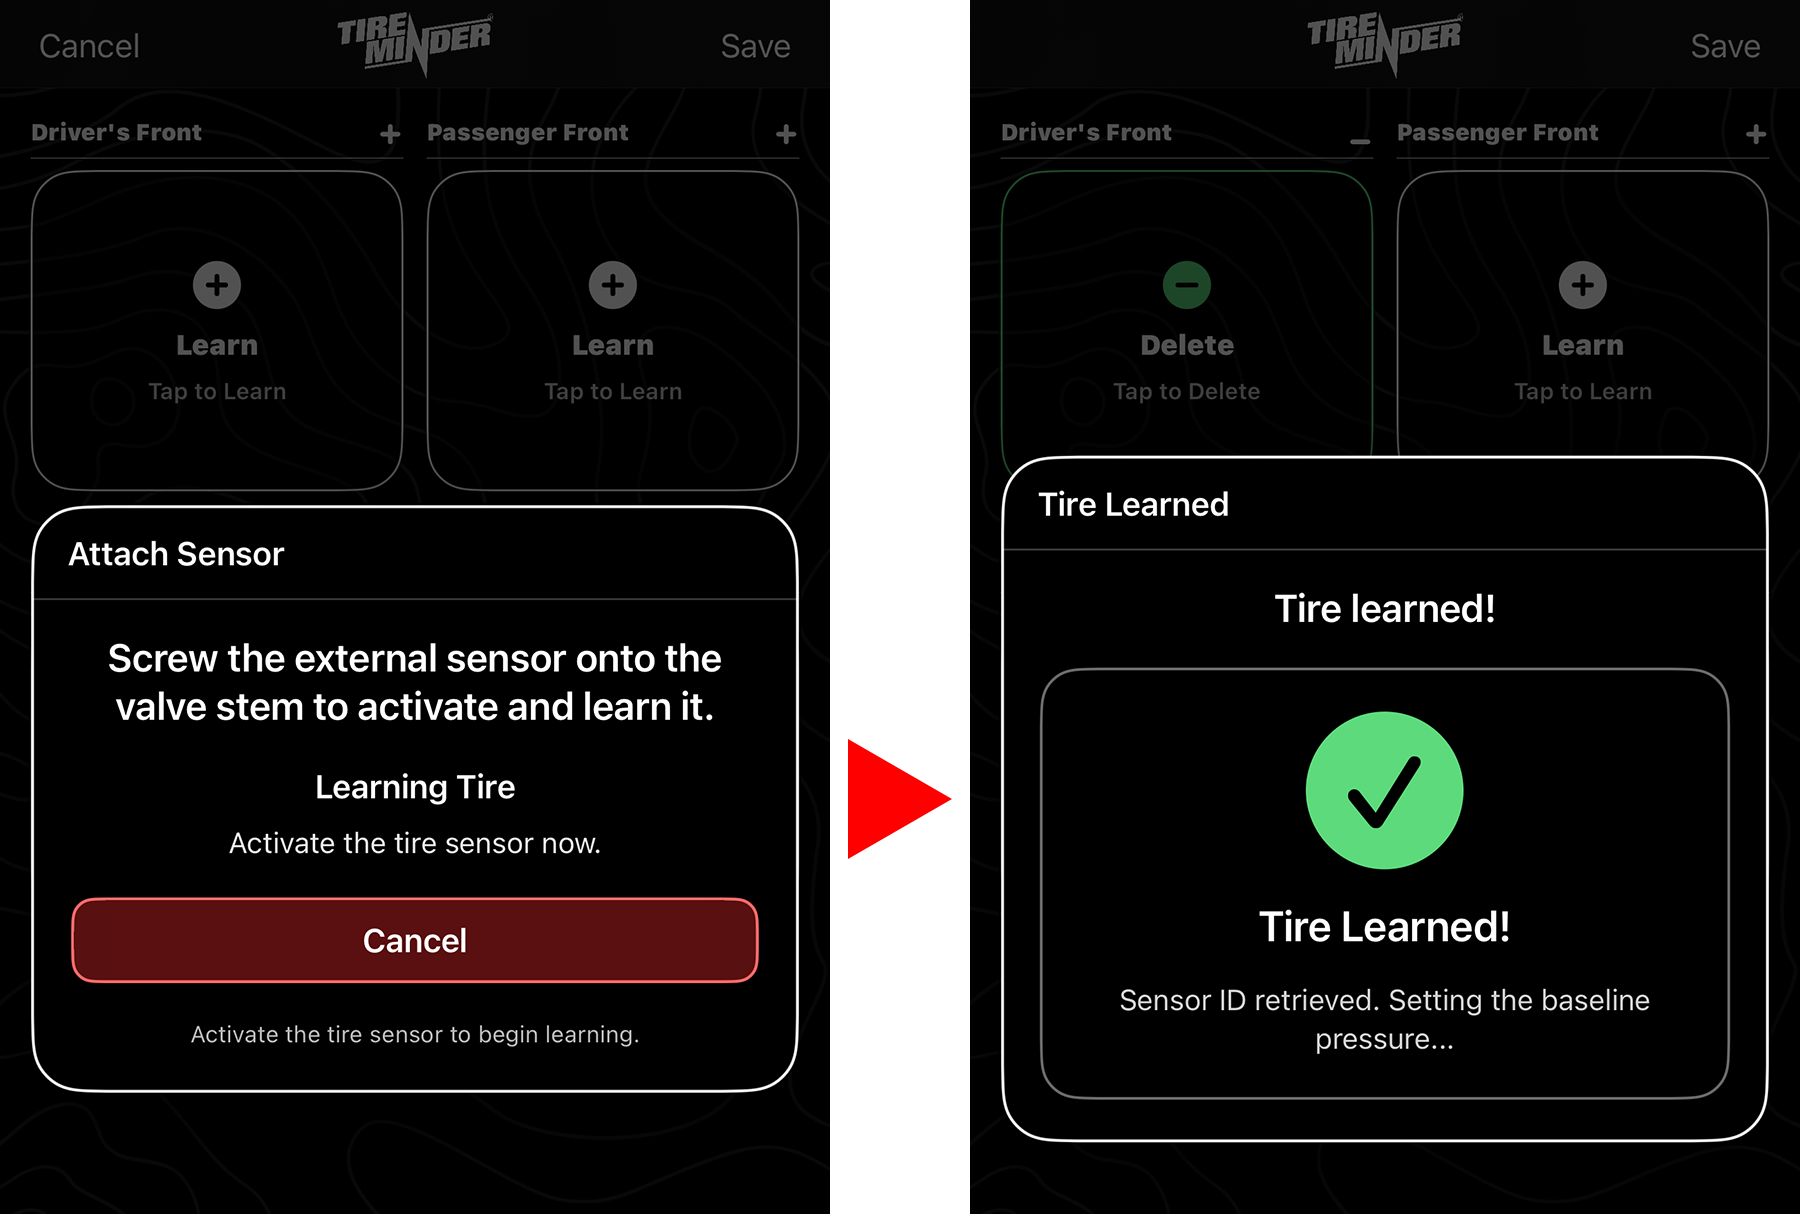
Activate the sensor: for an internal sensor, add air continuously for 10 seconds without overinflating; for an external sensor, screw it onto the corresponding Schrader valve stem.
Wait for Tire Learned.
Repeat for all positions. Green outlines indicate successful programming. Tap Save.
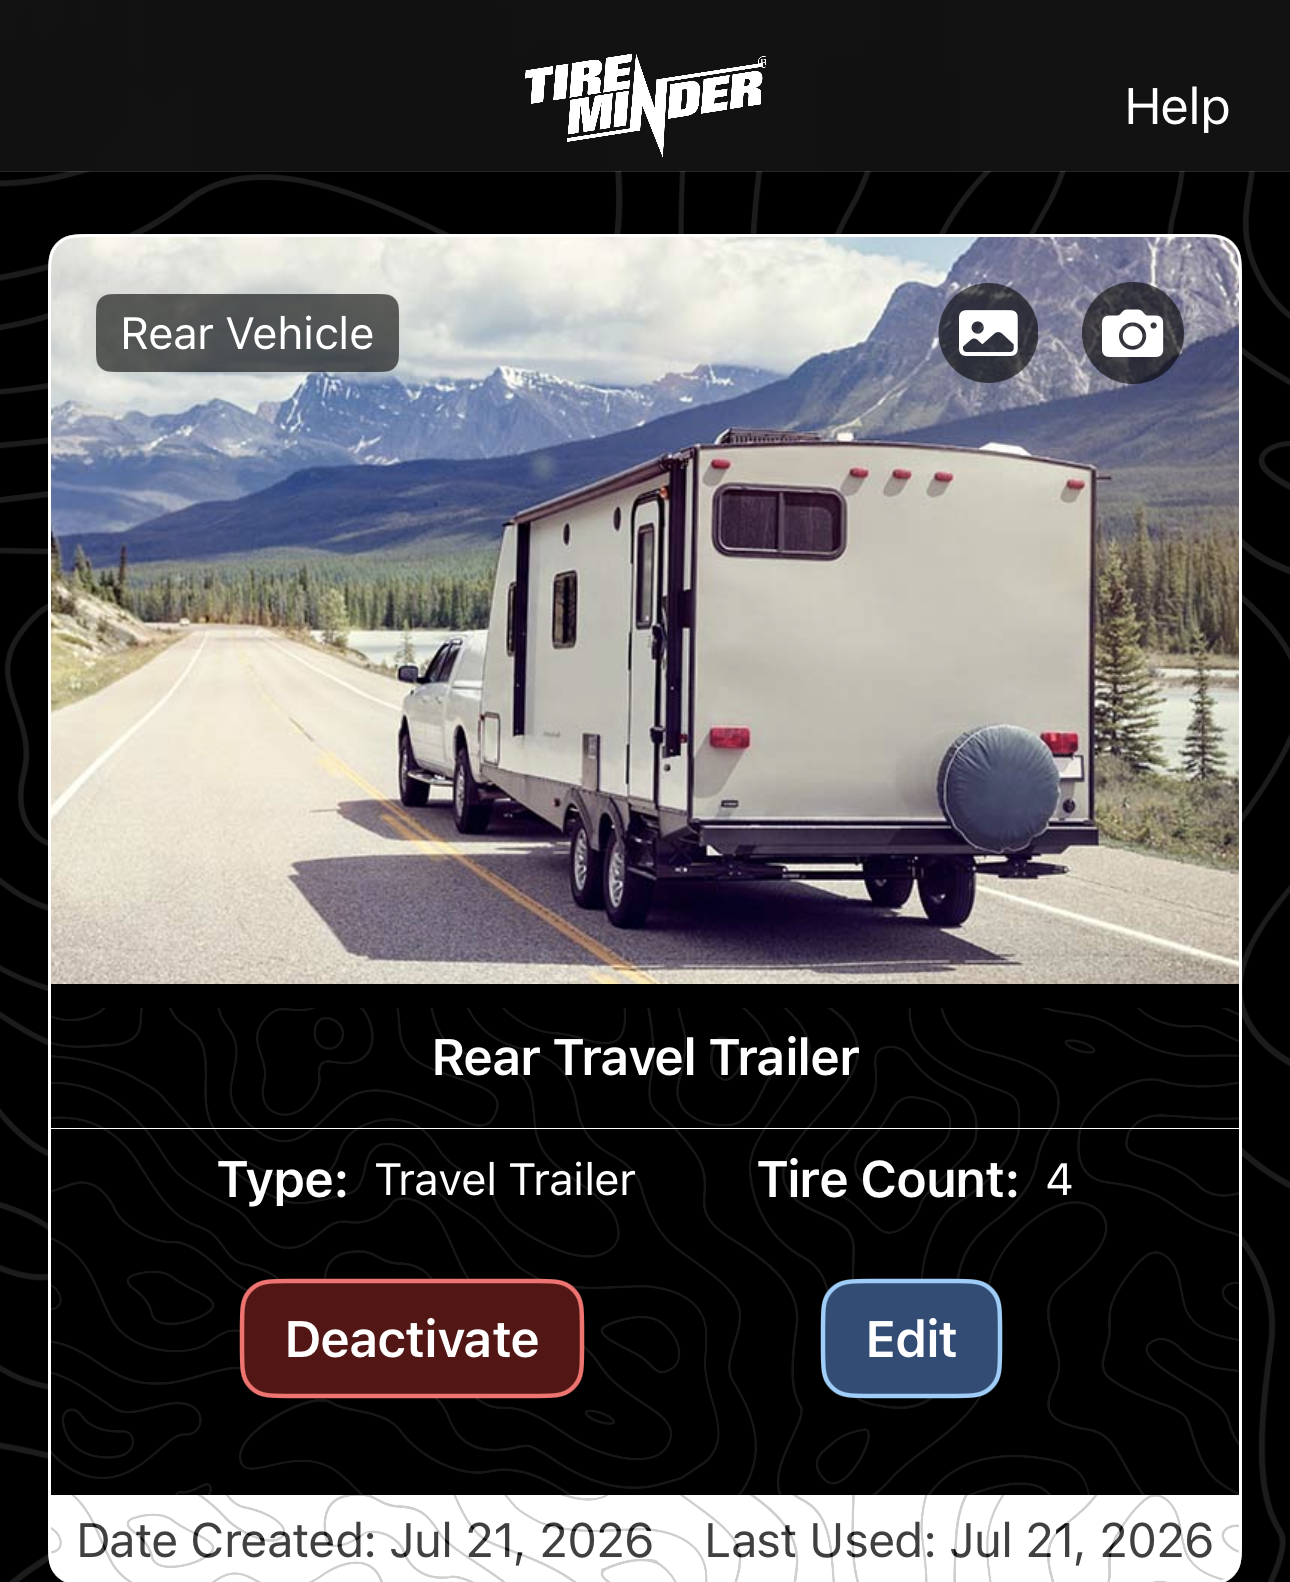
On the Vehicle screen, edit baselines, vehicle name, tires, image, or sharing settings.
Prepare first: Before Step 8, have sensors ready. For an external sensor, insert its coin cell battery but do not install the sensor on the tire until prompted.
13–16. Set Baseline Pressures
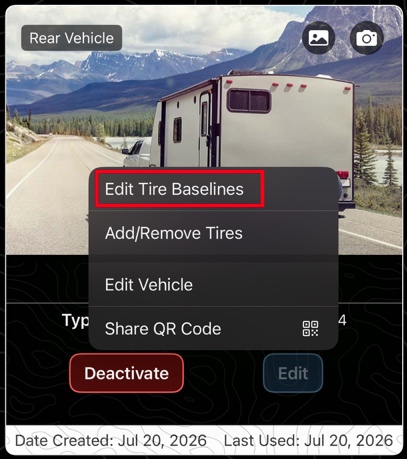
Tap Edit, then Edit Tire Baselines.
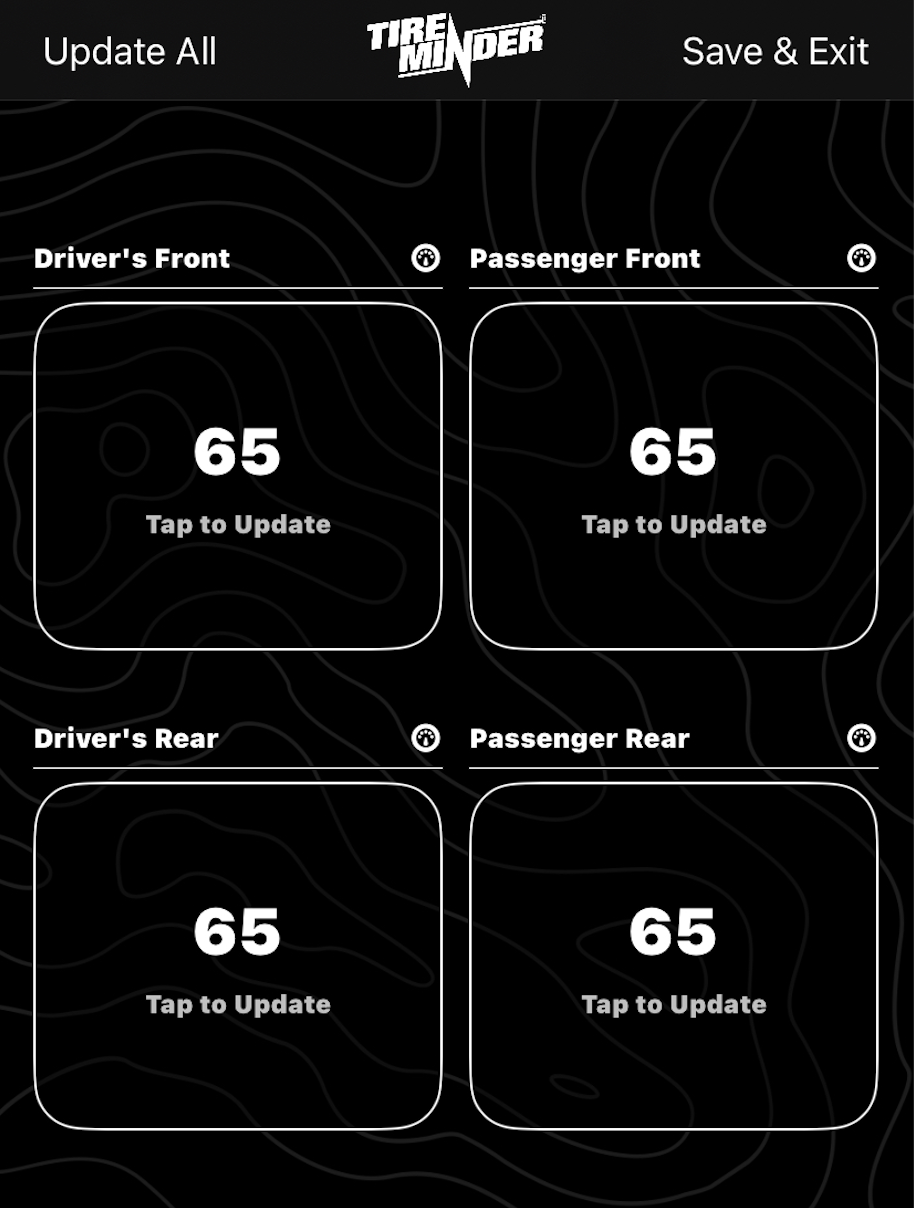
Tap each tire to set its baseline, or use Update All.
Tap Save & Exit, then Home.
Setup is complete.
Baseline Pressure Explained
Baseline pressure is the recommended ambient or “cold” pressure before the tires are driven, as specified by the vehicle manufacturer. The system alerts below 15% of baseline for low pressure and above 20% of baseline for high pressure.
HOME
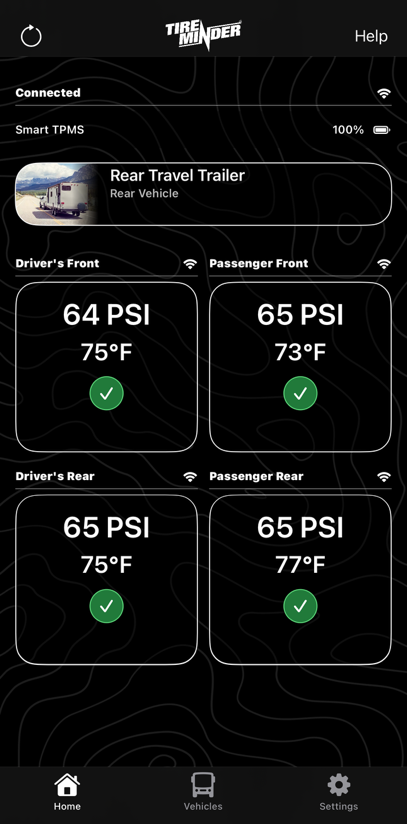
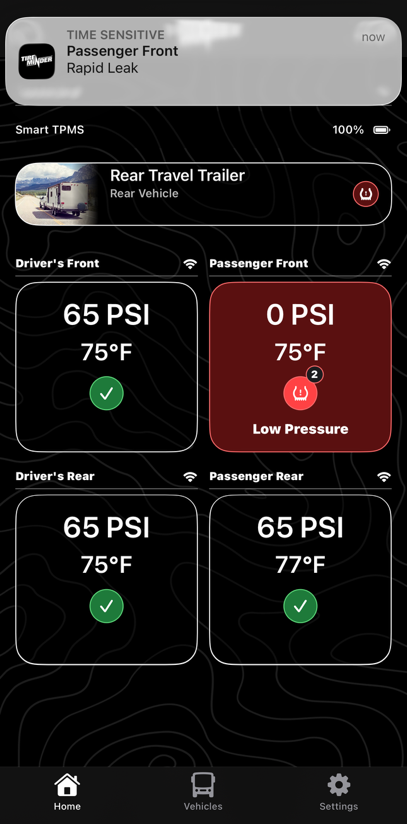
Home Screen Examples
Each active tire position displays pressure, temperature, and status. An alert changes the affected tile and creates an app notification.
NormalWith alert
ALERTS
How the TireMinder TPMS Alerts
Alerts may appear in the app, by push notification, and through CarPlay or Android Auto when applicable. The app must be running in the foreground or background.
Rapid Leak
Pressure loss of 3 PSI or more in less than 2 minutes.
Slow Leak
Pressure loss of 6 PSI or more in 2 to 10 minutes.
Low Pressure
15% or more below baseline.
High Pressure
20% or more above baseline.
High Temperature
167°F (75°C) or greater.
Signal Loss
No sensor communication within 20 minutes; may be adjusted to 10 minutes.
Module Disconnect
The module is disconnected from the app for more than 10 seconds.
What to Do if an Alert Occurs
⚠ WARNING
Do not view, interpret, adjust, or operate the TPMS monitor while driving. Distracted driving may result in loss of control, serious injury, or death.
Remain calm and maintain control.
Avoid sudden steering, braking, or acceleration.
Have a passenger review the alert when available.
Reduce speed as conditions permit and proceed to the nearest safe location away from traffic.
Use hazard warning lights as appropriate.
Inspect only after parking on a stable surface away from moving traffic.
Low Pressure or LeakSafely stop and inspect. Verify pressure with an accurate gauge. Do not continue if the tire is damaged, loses pressure, or cannot safely support the vehicle.
High PressureSafely stop and verify pressure. Do not release air from a hot tire solely to return it to cold inflation pressure. Allow it to cool first.
High TemperatureStop away from traffic and combustible materials. Do not touch hot tire, wheel, hub, bearing, or brake components. Identify the cause before resuming travel.
SETTINGS
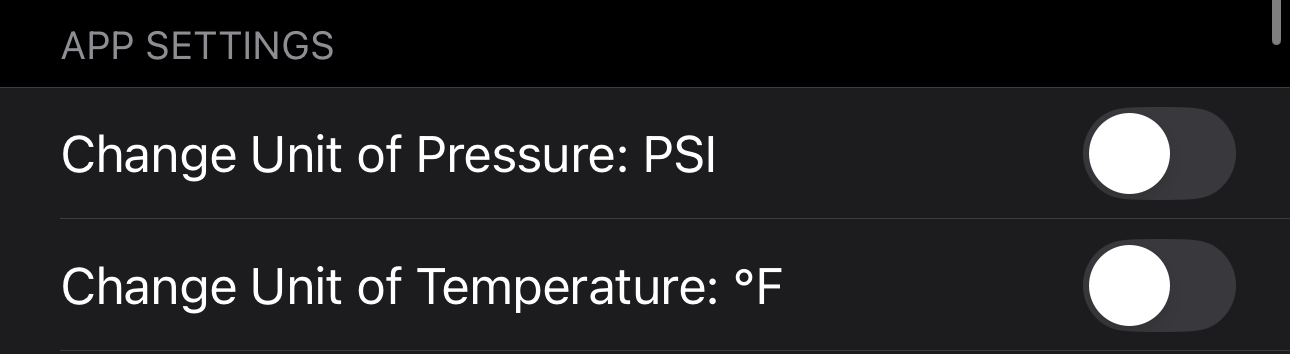
Units of Pressure and Temperature
Open Settings from the bottom-right tab.
Under App Settings, use the pressure toggle to switch between PSI and BAR, and the temperature toggle to switch between °F and °C.
Changes take effect immediately.
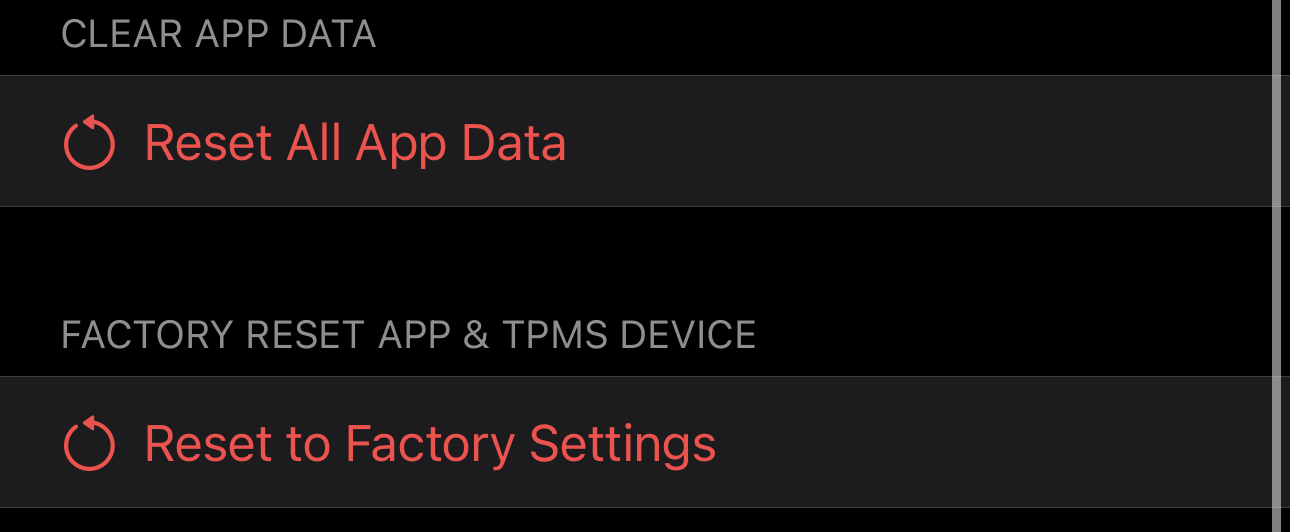
Start Over — Reset to Factory Defaults
Clear App Data Only
Open Settings.
Scroll to Clear App Data and confirm.
App data is erased, but tire information remains in the module.
Factory Reset App and TPMS Device
Open Settings.
Select Factory Reset App & TPMS Device and confirm.
Changes take effect immediately.
VEHICLES
Activating and Deactivating Vehicles
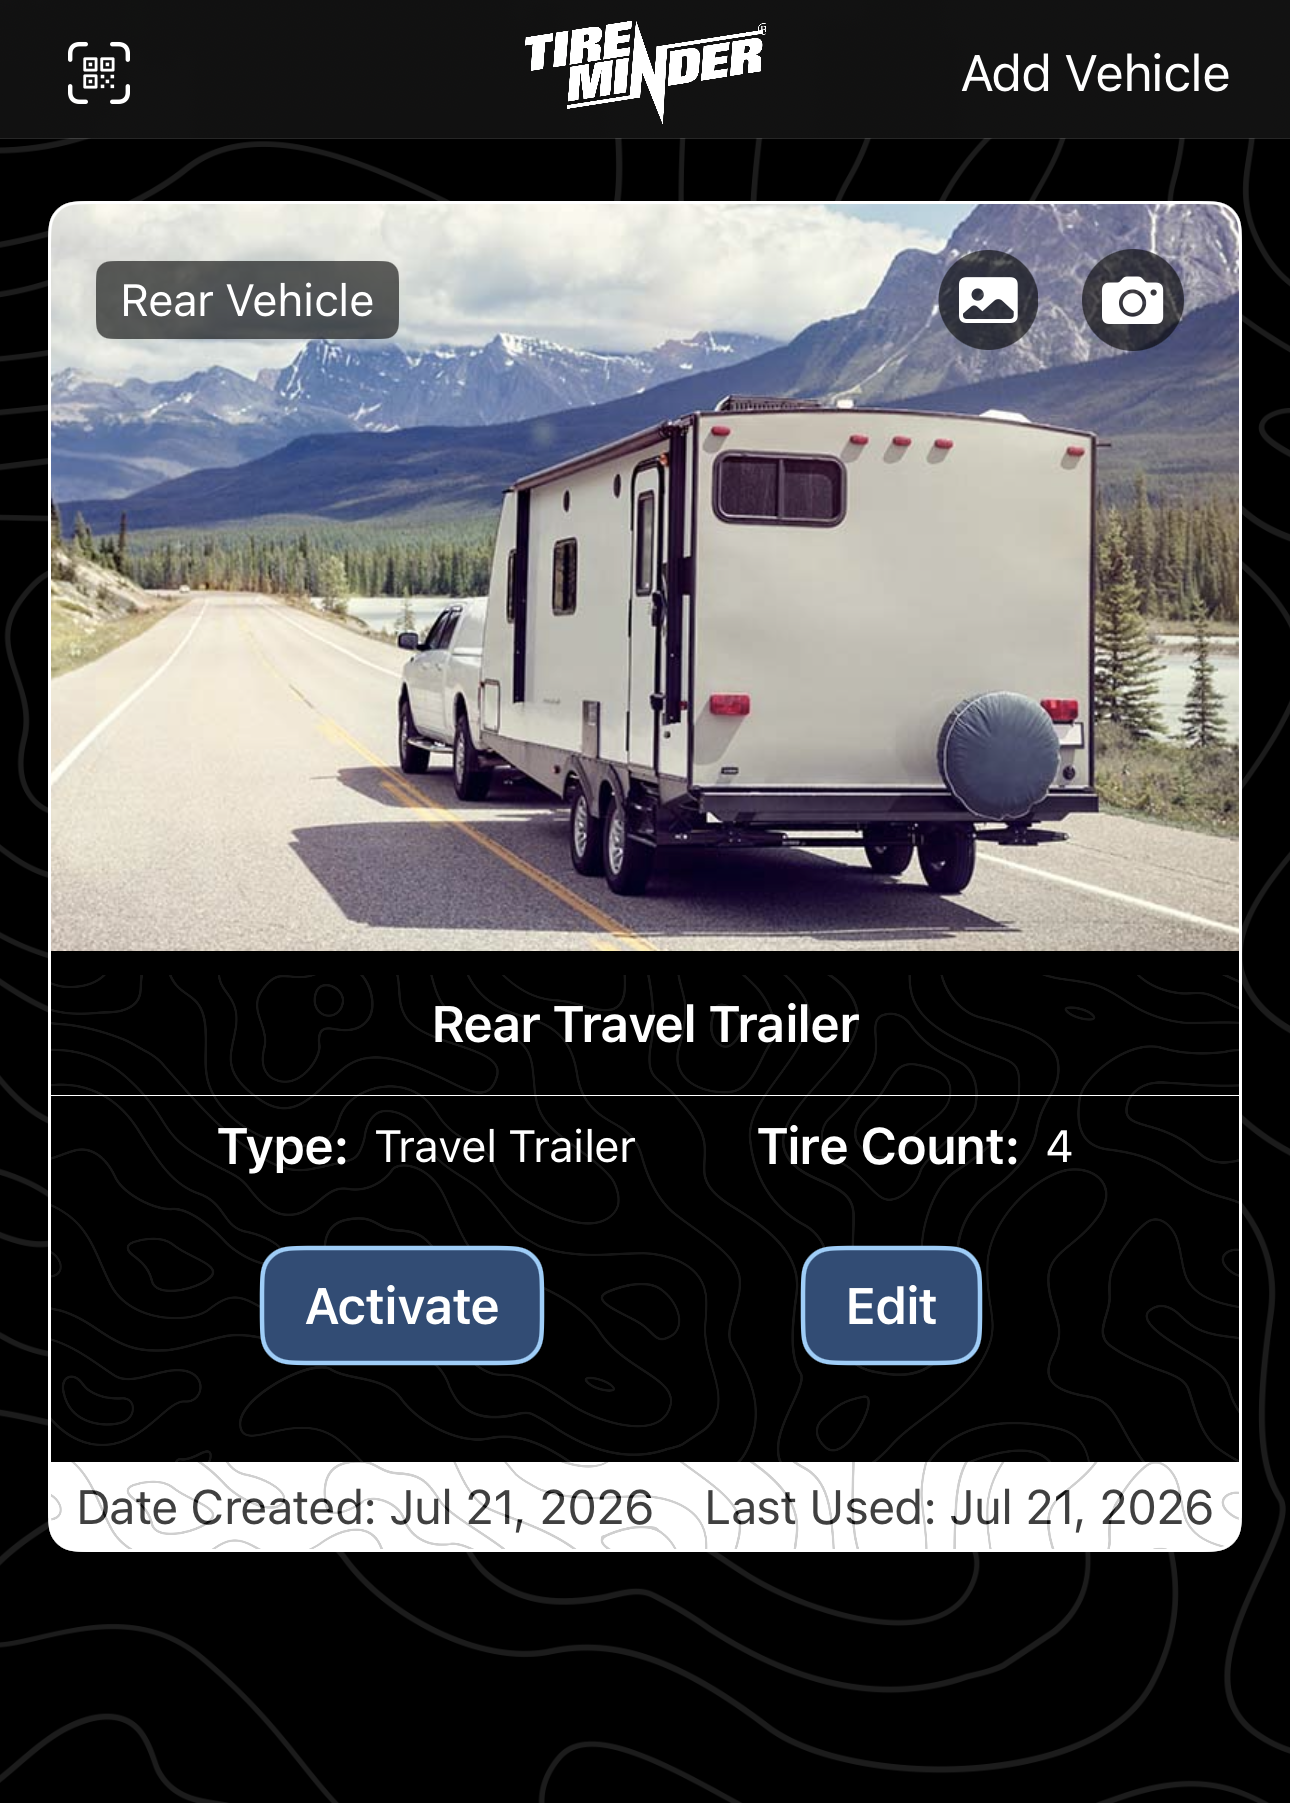
The app can store up to eight vehicles and monitor one front (motorized) and one rear (towable) vehicle simultaneously. Only one front vehicle and one rear vehicle can be active at a time.
Open Vehicles from the bottom-middle tab.
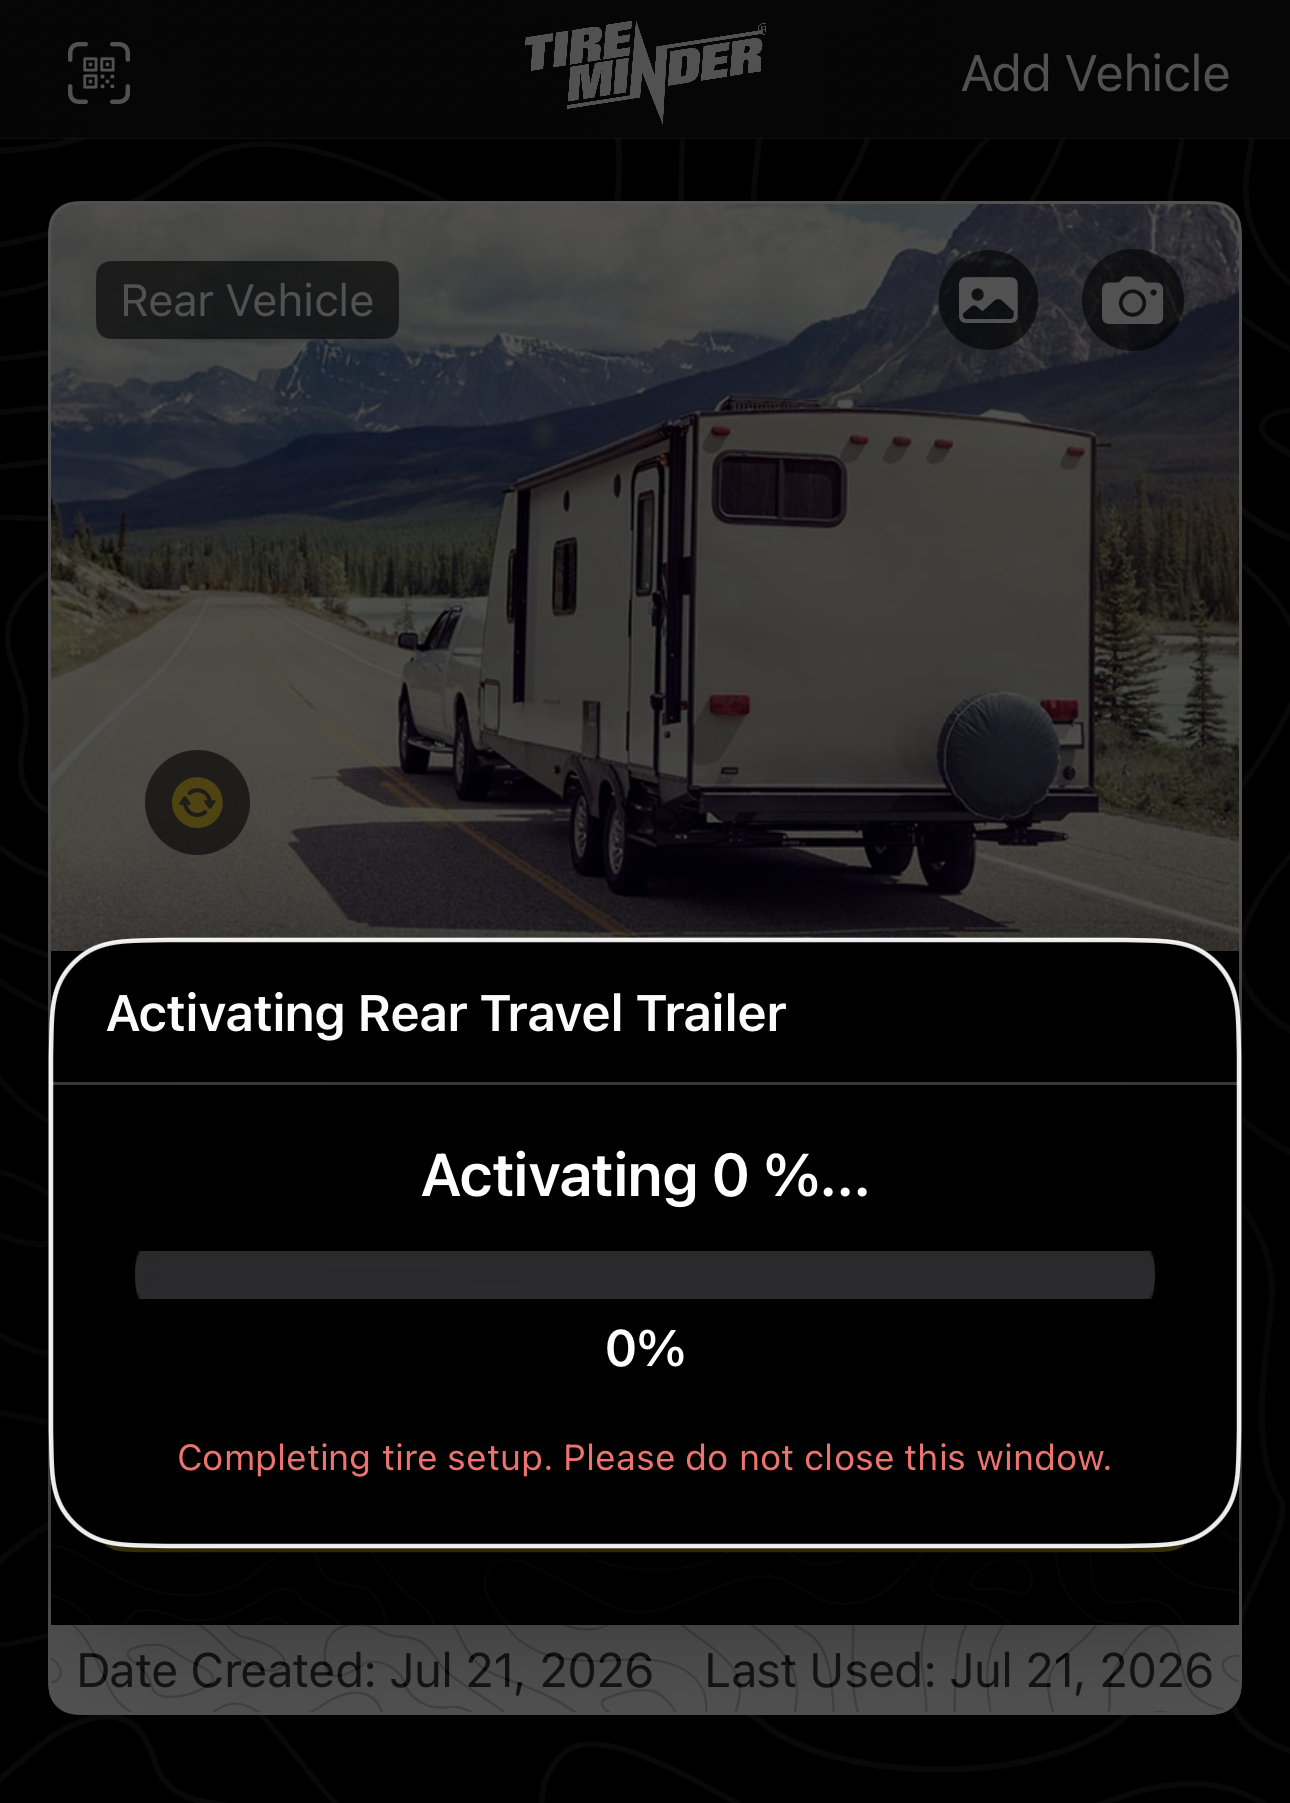
Tap Activate or Deactivate on the desired vehicle, then confirm.
Allow up to 20 minutes after reactivation for sensors to report. A No Signal alert appears if a sensor does not respond.
How to Add a Sensor
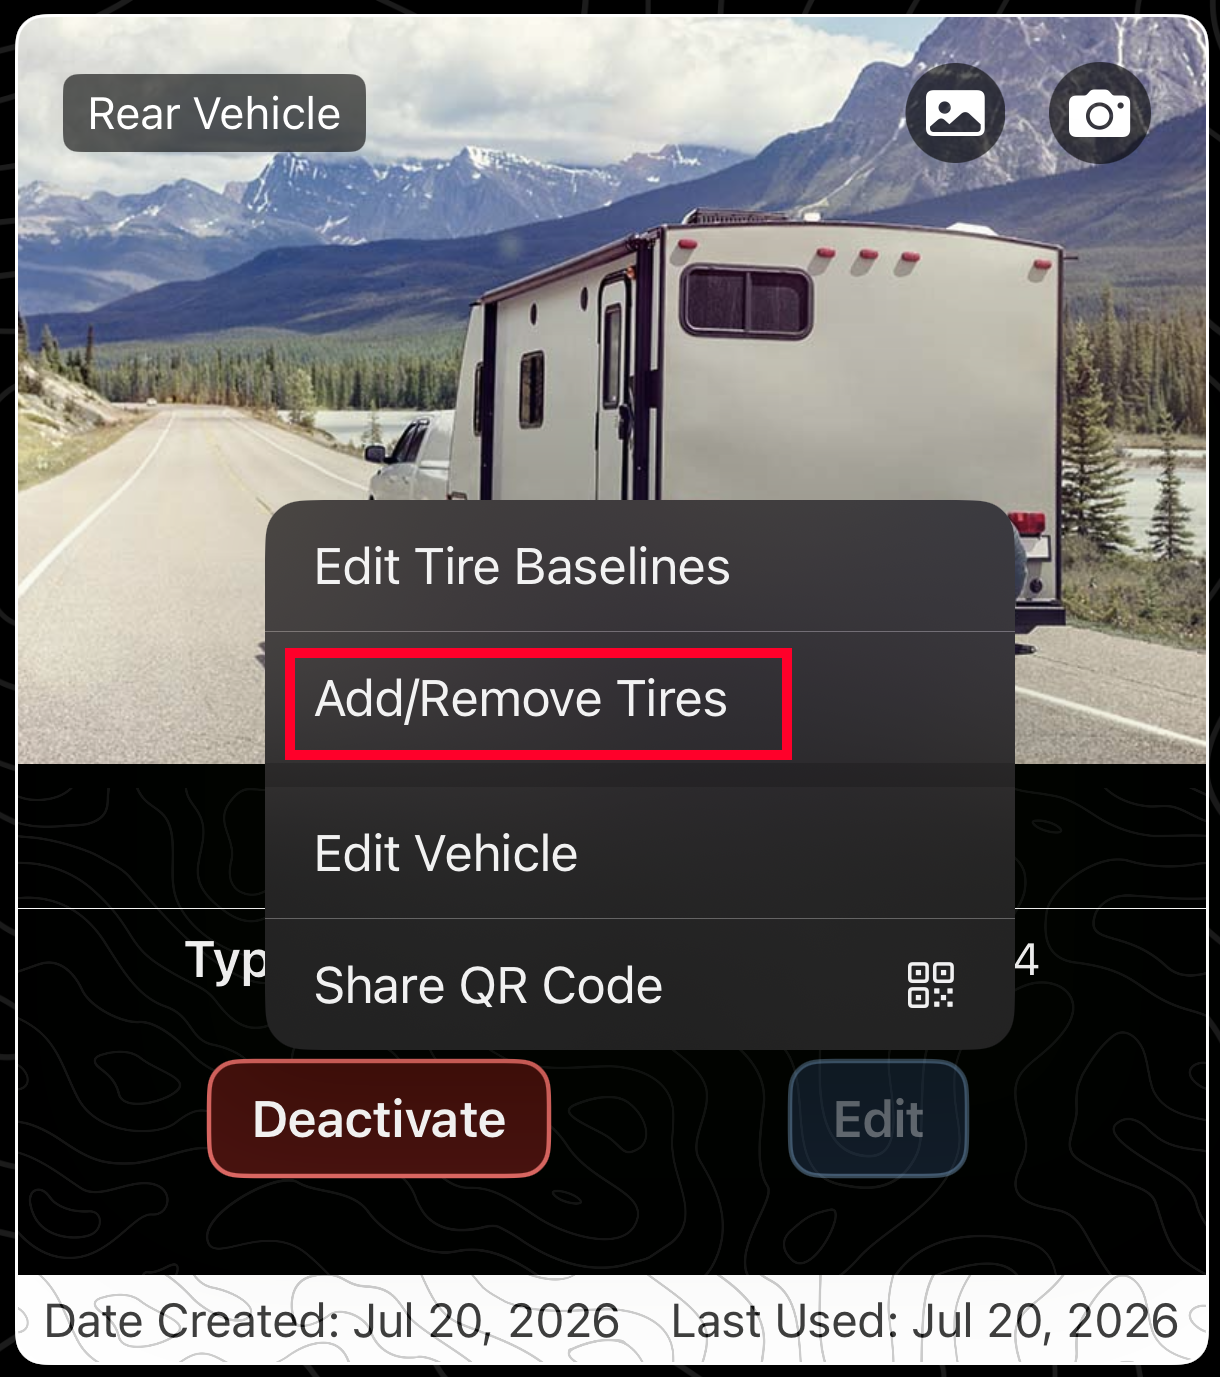
Open Vehicles.
Tap Edit on the active vehicle, then Add/Remove Tires.
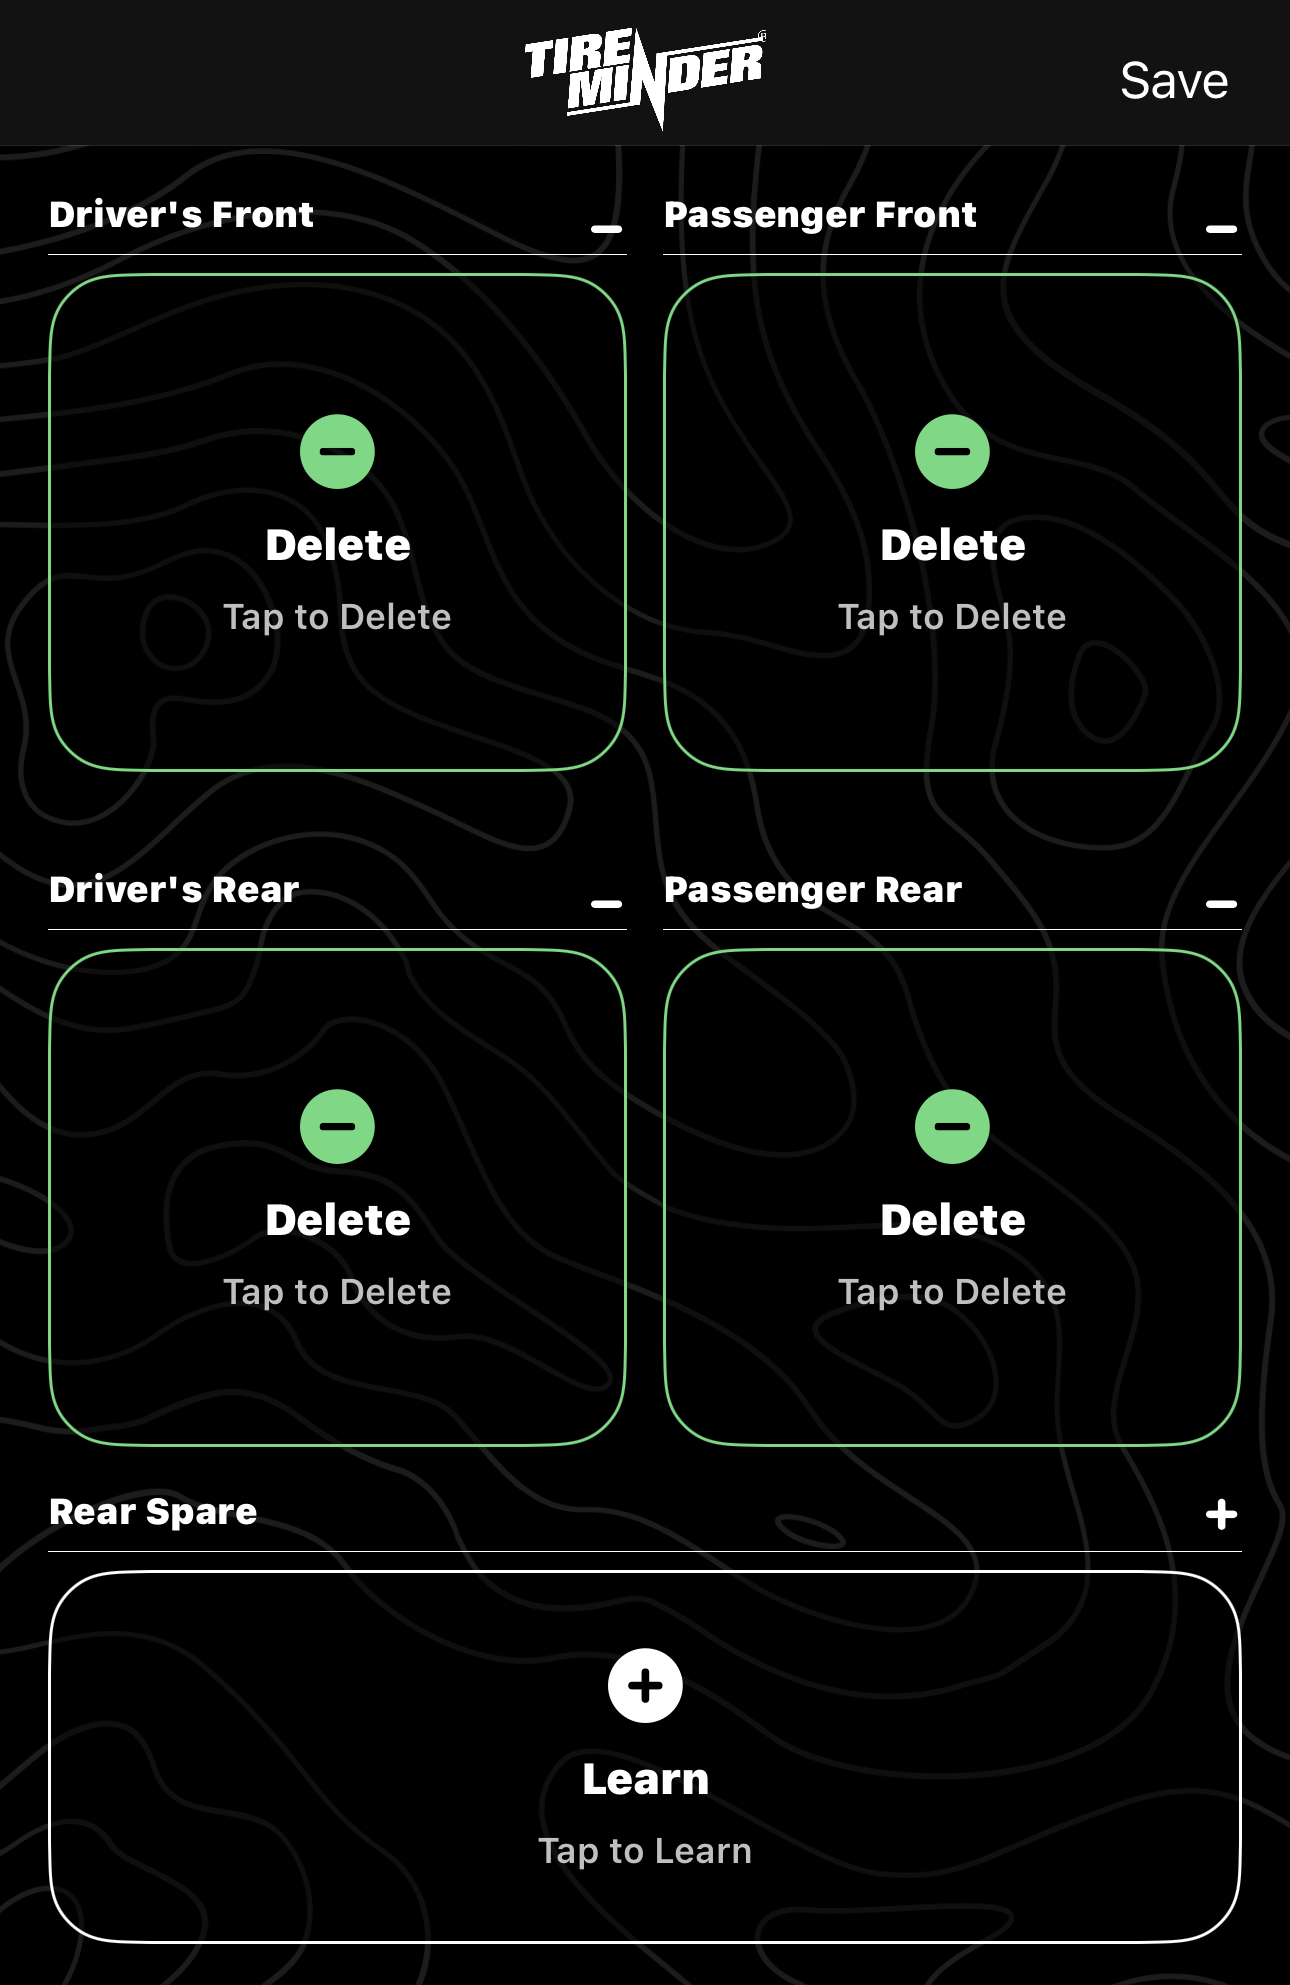
Available positions have a white outline. Tap the desired position and follow the prompts.
Tap Save.
A sensor can be added only while the vehicle is active. The same procedure applies to a spare tire.
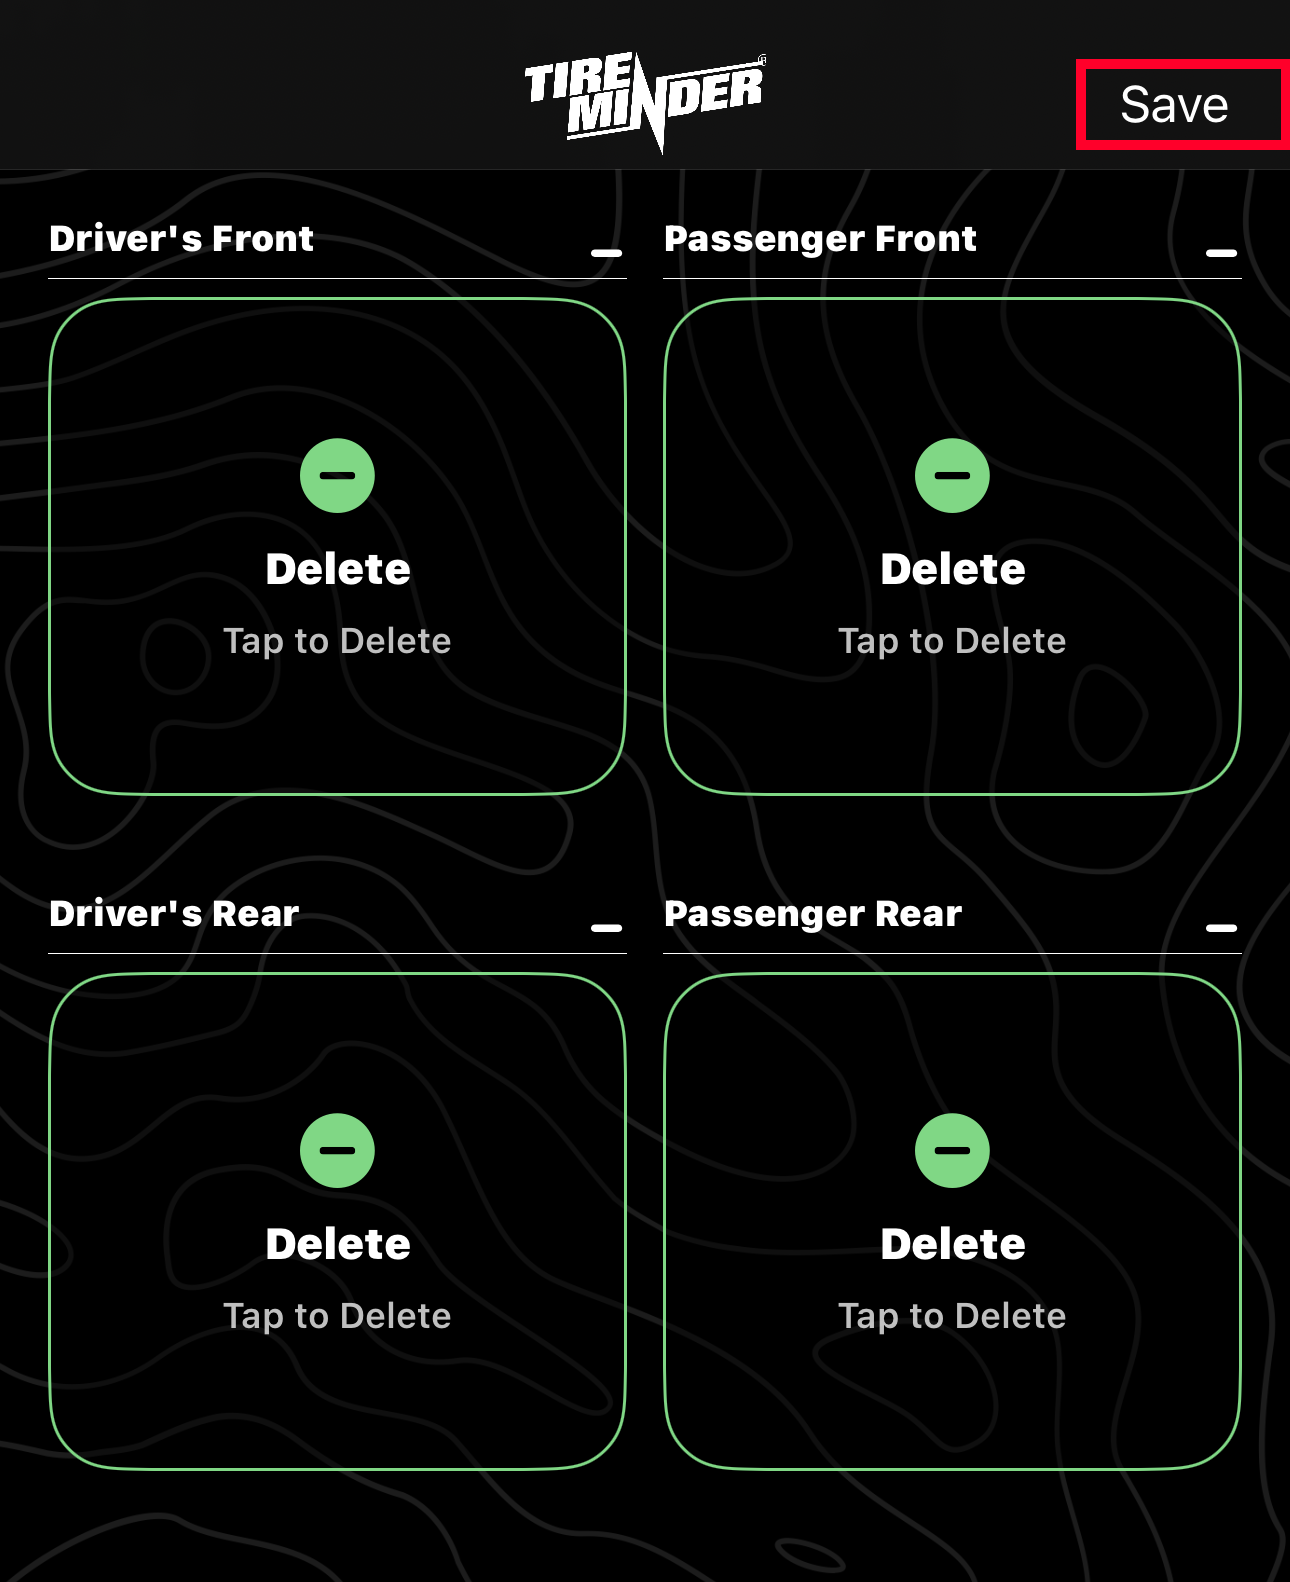
How to Remove a Sensor
Open Vehicles.
Tap Edit, then Add/Remove Tires.
Programmed positions have a green outline. Tap the desired position and follow the removal prompts.
Tap Save.
Set Baseline Pressure
Open Vehicles.
Tap Edit, then Edit Tire Baselines.
Tap an individual tire or select Update All.
Tap Save & Exit.
Baseline pressure can be adjusted only while the vehicle is active.
EXTERNAL SENSORS
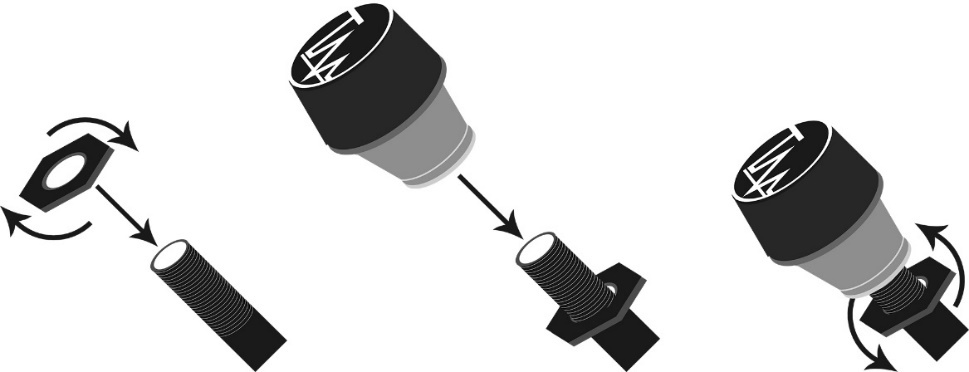
Locking Nut Instructions
Use locking nuts only when the vehicle will be in a static, high-risk area. They are for security and do not affect sensor operation.
Thread the hex nut clockwise onto the valve stem, at least 1/4 in (6.35 mm) from the top.
Thread the sensor onto the valve stem until hand-tight.
Rotate the hex nut counterclockwise toward the sensor and tighten it against the sensor with the wrench.
Coin Cell Battery Installation
⚠ WARNING
INGESTION HAZARD: This product contains a button cell or coin battery.
DEATH or serious injury can occur if ingested.
A swallowed button cell or coin battery can cause Internal Chemical Burns in as little as 2 hours.
KEEP new and used batteries OUT OF REACH OF CHILDREN.
Seek immediate medical attention if a battery is suspected to be swallowed or inserted inside any part of the body.
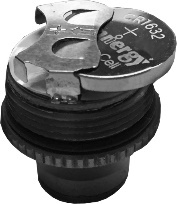
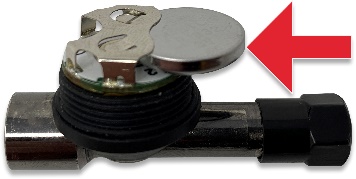
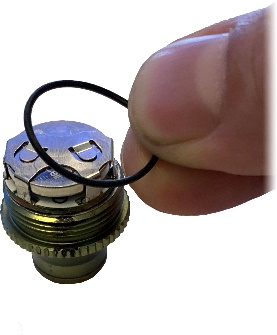
Slide the battery under the aluminum bridge, clip, or bracket with the plus (+) side up. Do not place it on top. Incorrect insertion may damage the circuit or solder connection. Tighten the cover finger-tight only; tools or overtightening can damage the O-ring.
O-Rings and Sensor Caps
Inspect O-rings and caps regularly. O-ring life depends on climate; consider annual replacement with the battery. Replace cracked or broken caps promptly because the cap and O-ring protect the sensor from weather and environmental damage.
Battery Replacement and Programming
The system does not need to be reprogrammed after battery replacement. Return each sensor to the same tire position from which it was removed.
REFERENCE
Technical Specifications
Sensor
Operating Voltage2.1–3.6 V DC
Operating Current8 mA
Operating TemperatureInternal Sensor: −40°F to 257°F External Sensor: −4°F to 185°F
Storage Temperature−40°F to 257°F
Pressure Range and AccuracyInternal Sensor: 0 - 290 PSI at ±1 PSI accuracy External Sensor: 0 - 170 PSI at ± 1 PSI accuracy (actual sensor pressure range may be higher)
Temperature Accuracy±3.6°F across stated operating range
Wireless Communication Method433 MHz TX
BatteryExternal: CR1632, approximately 1 year, replaceable. Internal: CR2450, more than 10 years from manufacture, non-replaceable.
Ingress ProtectionIP67
ComplianceSAE J3309, FCC Part 15B
TPMS Module
Operating Voltage9–30 V DC with built-in overvoltage protection
Operating Current30 mA
Operating Temperature−40°F to 185°F
Storage Temperature−40°F to 257°F
Wireless Communication Method433 MHz RX antenna for sensors; 2.4 GHz Bluetooth 5 for smart devices. 85 FT max Bluetooth range.
No SignalNo sensor communication within 20 minutes
Module DisconnectApp alert within 10 seconds when properly set up
Ingress ProtectionIP66
ComplianceSAE J3309, FCC Part 15C
SUPPORT
Limited Warranty
This TireMinder TPMS is guaranteed against manufacturing defects for 3 to 5 years from the date of purchase, depending on model. TireMinder will repair or replace a product section that does not function as designed.
Excluded are products damaged by impact, water, fire, misuse, or unauthorized service. The warranty is limited to product replacement and does not cover incremental costs. Minder’s liability will not exceed the purchase price. Rights may vary by state or province.